Intro
Music
Click on the following links to download your music:
Vivaldi Allegro Concerto For Flute
—————————————-
My favorite NON-BAROQUE MUSIC that I’ve used over the last 3 years
NuPhonics Ideal LifeVision CD $14.95 Click here
Breakthrough for Peak-Performance DR $19.95 Click here
Steven Halpern – Music for Accelerated Learning: Click here for download or CD
—————————————-
Songs from the Vision Guider:
Bach – Sheep may Safely
Bach – Air on G String
Pachelbel Cannon in D
Handel Minuet BereniceHandel Harp Concerto 6-2
Handel Harp Concert 6-3
Handel Water Music Air 1
Handel Water Music Sarabande
Handel Water Music Minuet
Vivaldi – Autumn
Vivaldi – Spring
Handel Organ Concerto (lst one)
Phone
Phone or iPod Voice Memo
 What’s really fun about the latest technology is that we can actually record our Ideal LifeVision on our phones. The only requirement is that it has a recording capacity.
Look for some variation of “voice memo” on your phone.
I have an iPhone and so I’m going to tell you how to do it if you have one of those (but it’s similar on any phone)
Recording your LifeVision on an iPhone or iPod touch.
**In addition to your iphone or ipod- you’ll need an additional way to play the Baroque music. I just open my iTunes on my computer and play it from that.
Think of this as the more modern version of recording with a cassette tape player 🙂
Find the voice memo app (icon is a microphone)
Tap the red record button at the bottom left of the window while at the SAME TIME – start your song on your computer. (A little tricky, but you can do it!)
Start reading your LifeVision into your device.
When you are finished first stop the music, then click on the same red recording button (it will say Paused)
After you’ve finished, tap the button at the bottom right of the app, with three horizontal lines. This takes you to the Voice Memos section of the iPod or iPhone, which displays the voice memos you’ve recorded with date, time, and length. You can play them back or delete them.
Tips:
- Create each section of your LifeVision separately.
- Name each section by clicking on the blue arrow to the right of your device, then clicking on the “description”, and then finally on “Custom” where you can type in the name of that section: “spiritual”
- Hold your phone about 6 inches away from your mouth when talking.
- Adjust the volume of the music if it seems too loud or too soft or move farther away from it.
- Tape just 15 seconds as a “test” before recording the whole things so you know you like it (so you don’t have to keep redoing it)
GarageBand for Mac
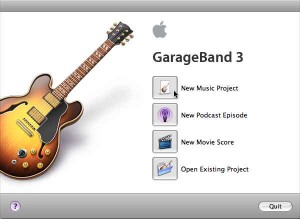
Open Garage Band (in iLife)
- Click on top option ~ Create New Music Project
- Make sure VOICE (microphone) is highlighted then click on “choose” – bottom right
- Name your first project/section. Example: Ann’s spiritual1/09 (click on Create)
- Two “tracks” will appear: Male Basic and Female Basic
- Delete the one you don’t need (highlight it in blue by clicking on it, then go to the top toolbar and under Track use drop down to find “delete track” and click on it. One track should go away.
- Go to far right side and make sure that you have both “vocals” and “No effects” highlighted.
Continue…..
- On the bottom of the program there is a RED DOT. That is the recording button.
- Have your printed LifeVision nearby so you can read it, and when prepared, click on the Red Dot.
- When you’re finished: first click on RED DOT again, then on the Single Arrow next to red dot to stop moving the program forward.
- **If you mess up and you fix it by simply moving that red line (positioner) to the last good sentence and then hitting record again. It will record over the top of your mistake. Use the space bar to start and stop your recording to hear it (space bar become a “toggle” for listening – don’t use when recording though)
- To add the music – Add another track (Click Track on the top toolbar and then click on NEW TRACK) Again hit Real Instrument Track.
- Hit arrow two over (left) from Red Dot to take you back to the beginning of recording.
- In the very bottom corner (right side) of program you’ll see an icon with a musical note – click on that and open iTunes and find appropriate music for your LifeVision.
- Drag the song from iTunes into the new Track and move it (by clicking on it )and dragging it to the far left of the track so that it is “aligned” to the beginning.
- Adjust the VOLUME buttons on each of the 2 tracks (increase voice and decrease music…PLAY to hear adjustments using space bar) In Blue box – bottom right is the volume control.
- To cut off the back end of the song – if it’s too long – take the red bar line about 5 seconds beyond the end of your recorded words and then click on top tool bar “Edit” and click on SPLIT – this will split the song so you can highlight the right side and then hit delete and it will go away! (The track must be highlighted to split it)
- Then click on your recorded words and under “Track” hit “Fade out” and the end of the song will simply fade out.
- When you have it the way you like it, Click on SHARE (on top toolbar) and select “Send Song to iTunes”. Hit “Share”
- It will show up in your iTunes!
- Make playlist and drag into.
- Repeat for rest of Life Sections: Physical, Professional etc.
Audacity for PC
Recording with Audacity
Audacity is a great program and takes some technical patience to set up.
Copy and Paste this link in your browser to download and learn more:
https://www.audacityteam.org/download/

